ezCheckPrinting Software: How to Add an Account
ezCheckPrinting software can support unlimited accounts with one flat rate. If you are an accountant with many clients, or your company has multiple banking accounts, this article will help. In this article, you will find:
How to add a new account How to switch the current account How to view more check data How to purchase extra license
Add a New Account
There are two options to add a new account.
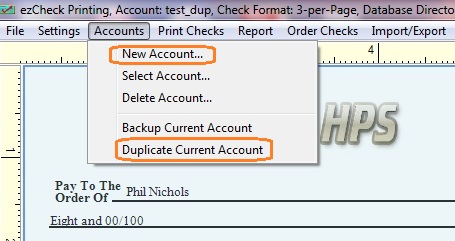
Option 1. Click the top menu "Accounts->New Account" to add new bank account.
 Video Guide: How to Add a Checking Account
 Option 2. Click the top menu "Accounts->Duplicate current account" to add a new account by duplicating the current account.
Switch the Current Account
For single user version
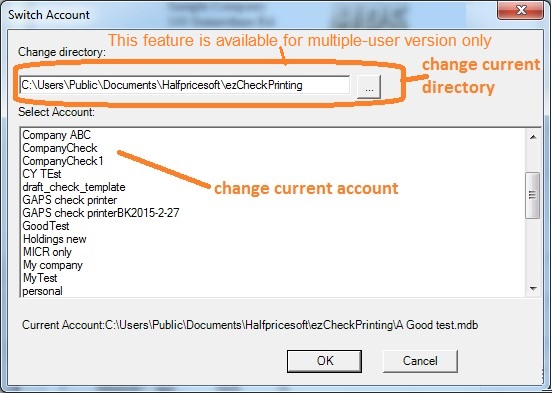
Start ezCheckPrinting, click the top menu "Accounts", then click the sub menu "Select Account" to view account list.
Note: You cannot change the default data folder path with the sinlge user version. This feature is available for multiple-user version only.

 For multiple-user network version
Start ezCheckPrinting, click the top menu "Accounts", then click the sub menu "Manage Account". You can change the current account path here.
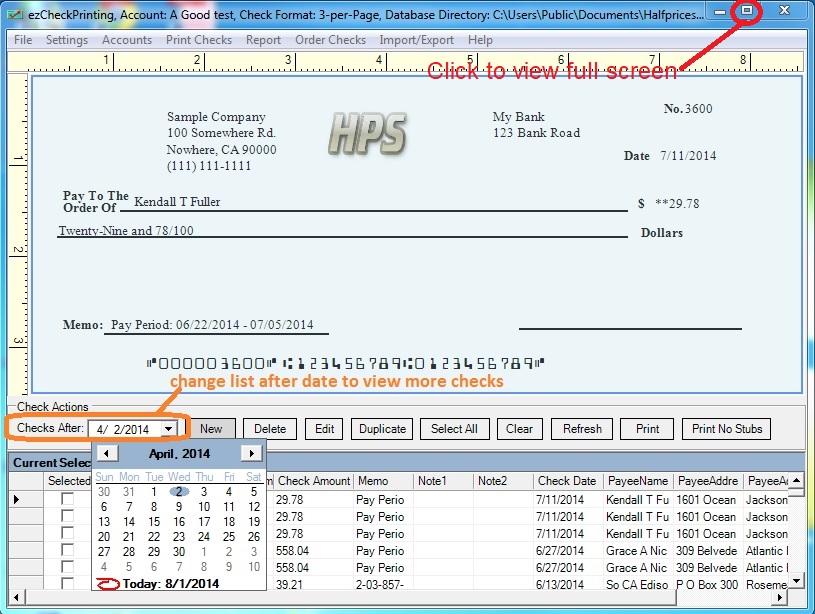
How to View More Data
After you switch the account, you can change the "Check After" date to view more checks
How to Upgrade ezCheckPrinting
If you purchased single-user version and need to upgrade to multiple-user version, please feel free to
contact us for the special upgrade purchase link. In your message, please specify
- the email you used with your previous order
- how many licenses in total you need now
 | Design and Print Professional Checks Yourself
- Print checks on blank stock with logo and signature
- Fill in data on pre-printed checks
- Print blank checks to fill in later
- QB virtual printer for QuickBooks/Quicken(for Windows)
- Unlimited accounts and checks for Windows and Mac.
Try ezCheckPrinting free demo version with no obligation and no credit card needed.
|
Related Links:
How to print paychecks on blank stock How to print personal check on blank stock How to Print QuickBooks Check on Blank stock How to Print pre-printed check with MICR Encoding to fill in manually How to Print check with logo How to print check draft to collect payment online