ezCheckPersonal Mac: Quick Start Guide
If you have not installed ezCheckPersonal for mac version, you can download it fromhttps://www.halfpricesoft.com/personal-check-writer/mac-check-writer-personal-download.asp
Just follow the instructions on the download page to finish the installation.
Note for new MAC customers:
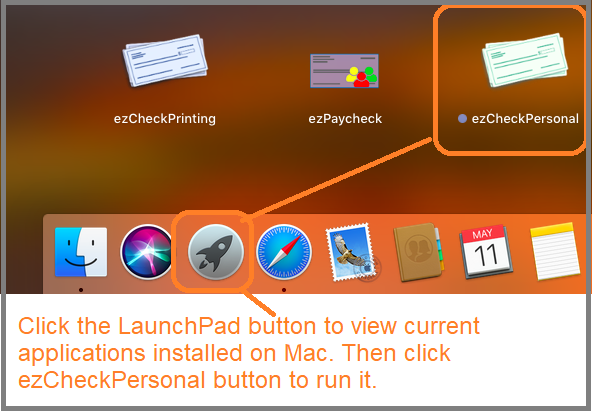
Do not click the installation file again once you installed ezCheckPersonal software on your Macintosh. You can open ezCheckPersonal application by clicking the LaunchPad button, which is similar to Windows's Show Desktop button.
Click the Launchpad button, then you will see the current applications intalled on your Mac machine. Click the ezCheckPrinting icon to start this check writer application.
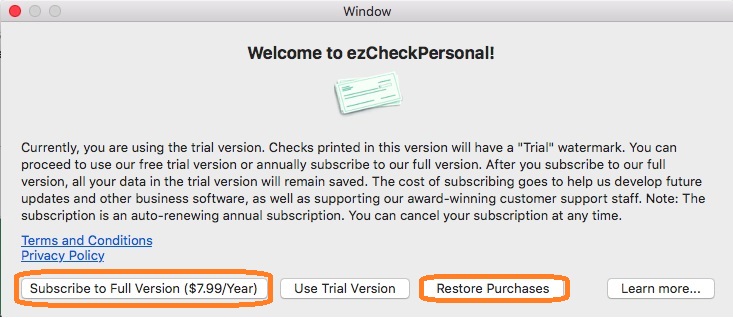
If you have not registered the key code, you will see license popup windows. If you just want to test the trial version, simply click "Try DEMO Version" to continue.
Click the top menu "Settings → Edit Current Account" to open the check setup page. Set up your check information and add your check logo file there.
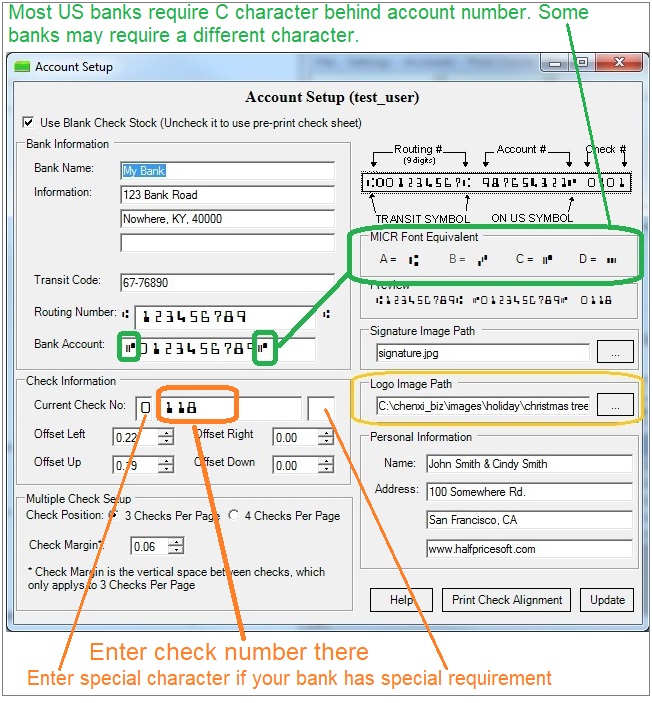
Bank information is required. If you select to use pre-printed check, you can leave the default sample data here.
This information is optional. If you have this data on your old check, you can enter it. Otherwise, you can leave this field blank. US banks will not use this information to process checks today.
ezCheckPersonal supports blank check stock and pre printed checks for check on 3-per-page or 4-per-page business size formats.
Enter the starting check number on this screen. ezCheckPersonal will increase the check number automatically when you add a new check.
Most customers can leave the values as 0 (zero). You can adjust the value to print check higher or lower if your printer is special.
You can choose your own logo image and signature image. If you do not want to use images, you can delete the data and leave these fields blank.
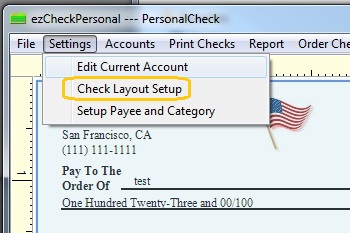
Click the top menu "Settings → Check layout Setup" to open the check layout page. You can customize the layout of your check by changing the font size, logo position, logo size or add a new label. (clickhereto learn more)
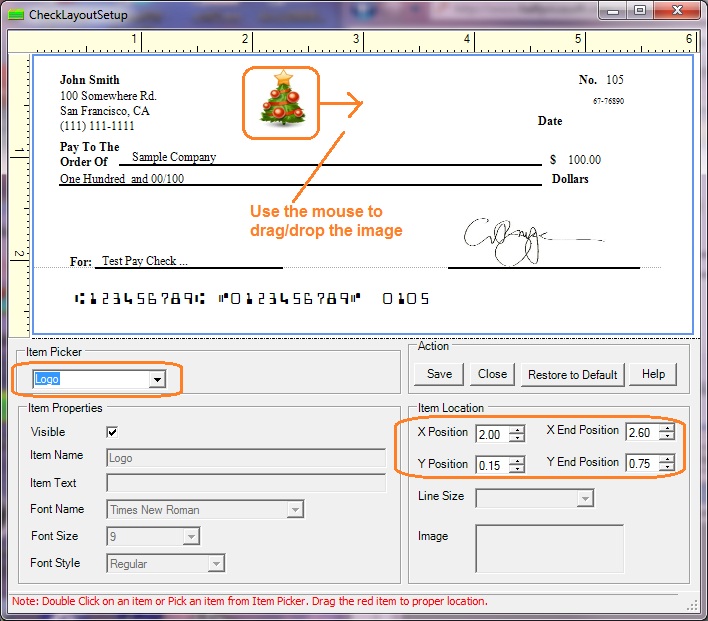
To customize the logo, you need to select the logo from the item picker first. Then you can resize it or drag/drop the logo to a new position. If you are satisfied with the effect, you can save your change.
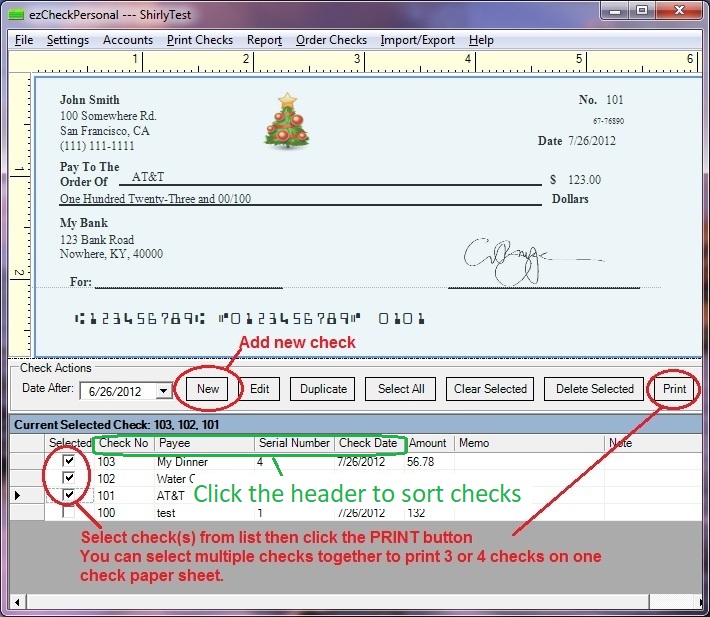
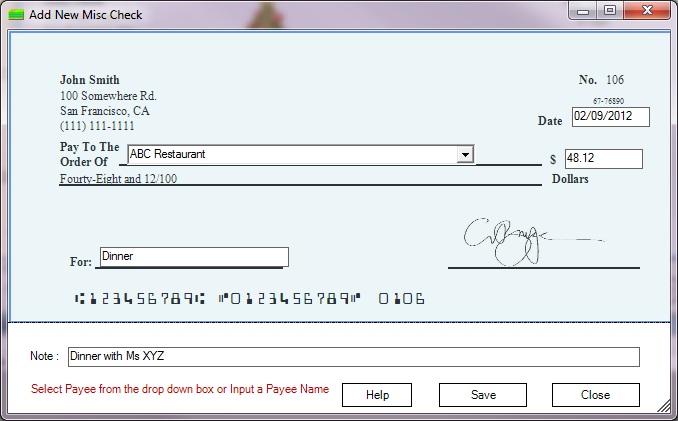
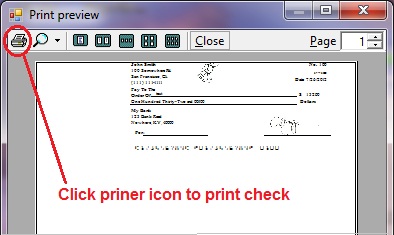
Save the chagnes and go back to the main page. Click the "New" button to add a check. Select this check from the check list and click the "Print" button to print your check.
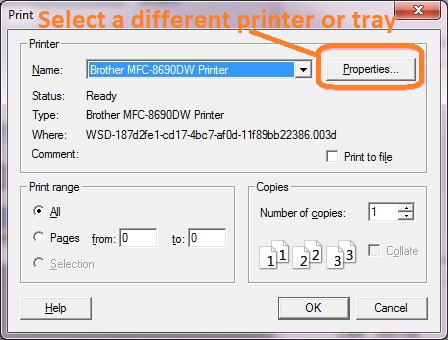
Select one check or multiple checks from list and click "Print" button, you will see Print option screen. You can select a printer or a tray there
ezCheckPersonalallows customers to design and print pocket-sized personal checks with MICR encoding and logo on blank stock. You can also use it to fill out preprinted blank checks too.
If you have not installed this software, you can download and try it free with no obligation and no credit card needed.
This check printing software is compatible with Windows 11, 10, 8.1, 8, 7, Vista, XP, Me, 2003, 2000 and Apple macOS.
Please feel free to contact us whenever you need assistance. Our support team is glad to assist you. You can also check the FAQs page or email services@halfpricesoft.com.